Tuesday 26 August 2014

Crafting by not a very crafty mum - tie birthday card

The quest continues to make various things with Little E, but it's hard when he is only 11 months. I gave him a crayon to see if he would scribble something, but he ate it. A few minutes later we had purple vomit!

Fortunately, Little E started nursery about a month ago and his "paintings" have been coming home with him. I'm sure people are less squeamish than me, but I really can't bear the thought of an under one year old with paint in my house! Thank goodness for nursery with their wipe clean surfaces!


I saw lots of homemade tie shirts for Father's Day and was sure I could use one of Little E's finger paintings to make it.

First I need a good tutorial, as always and found this one very helpful.

http://thismummy.com/diy-shirt-and-tie-card-for-dad/

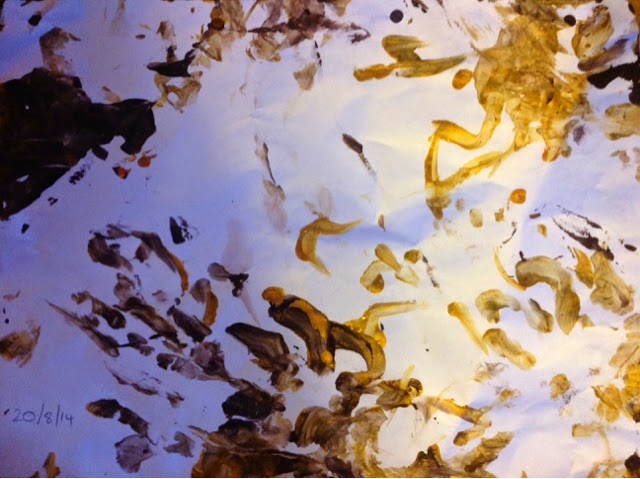
I used a very similar finger painting above, which was brown and gold, so I bought some A4 gold paper from Pen to Paper Summertown. I downloaded an image of a tie and used that to cut out the shape, as I didn't trust myself to do it by hand.

Problems I encountered:

1) I realised too late that the card I had bought was only gold on one side. It was white on the other. When I folded the card back, of course it made the "shirt" have a white collar. However, big E has a few colourful shirts with white collars and cuffs to contrast, so it didn't matter.

2) The tutorial was for a card in a different size to mine. I had to fiddle about a bit to get the collar to fold together properly. As ever, as I am a bit slap dash, I could have cut away too much card, so just be warned!

Apart from that, it was easy peasy! See the finished result below.


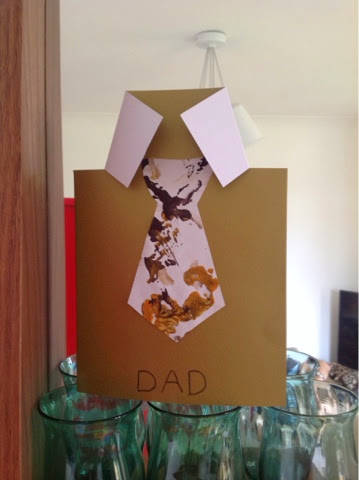
Big E really likes it and it is a way to preserve these early paintings without having to keep piles of paper.

Crafting by a not very crafty mum - jar lid toy

This was another project that we were told about at one of my baby clubs. We were creating a variety of "treasures" for our babies.

Simply take a clean metal lid and stick something inside. We used double sided sticky tape on the day and put in pictures cut from magazines such as flowers and faces.

I had some photos lurking about, that don't fit into any of my frames. I thought it would be fun for Little E to have some family photos for him to keep. I used the lids to draw around the faces I wanted to cut out. The great thing was, I then didn't need any sticky tape, as the photos just clipped into place. Little E has chucked them all over the place and never been able to dislodge them.

I just have three at the moment, but I thought it would be fun in the future to make more for Little E to play with as a guessing game. Flip them over and match the grandparents, etc. :)


Tuesday 12 August 2014

Crafting by a not very crafty mum - tote bag

I was given this beautiful fabric for Little E's naming day.


Oh the agony! Being given something so beautiful and having no idea what to do with it. Even if I did think of something to make, what if I made a mistake and spoilt it?

People came up with lots of ideas (cushions, wall hanging, etc), but I really wanted it to be something Little E needed. I borrowed some great books from a friend, which had loads of ideas, but most beyond my skill level!


I decided to be patient and wait and see if anything inspired me.

Then Little E started nursery. He needs a light bag to carry a few things, such as his dummies and sleeping bag. He has a little peg to call his own to hang it on. I was sure I could make a bag!

The books above had loads of different bag patterns, but I needed something idiot proof and a tote bag seemed the simplest to make. I found the instructions confusing in the books, mainly because I am not familiar with the different terms. As before, I found a step by step video guide much more helpful.

I looked at several on YouTube, but Stitched Up appealed the most to me.


I thought this video was great. Really easy to see and hear. Nice and simple. I don't have a sewing machine, but I had no problems stitching everything by hand. I used a running stitch, mainly because it is one I can do (!), but also because it looks neat.

I was hoping to be able to cut off some of the polka dot border to make the straps, but there wasn't enough fabric. I could have tried to make a smaller tote, but it started getting complicated and I was at risk of cutting off some of the pictures. In the end, I used all the fabric I had to make the body of the bag and a good friend of mine let me rummage through her fabric bag to find something for the handles.

And... Ta dah!


I'm pretty pleased and it feels pretty sturdy, however I wouldn't trust my stitching to carry my shopping home!

The fabric pattern doesn't quite work with the bad design, as on the other side, the caterpillar is upside down...


...but I'm not too bothered. The patterns in the books that I saw always had the most amazing fabrics that worked with their design perfectly, but of course most of the time we have to make do with what we have.

Really quiet chuffed with myself. Hope it doesn't fall apart at nursery!